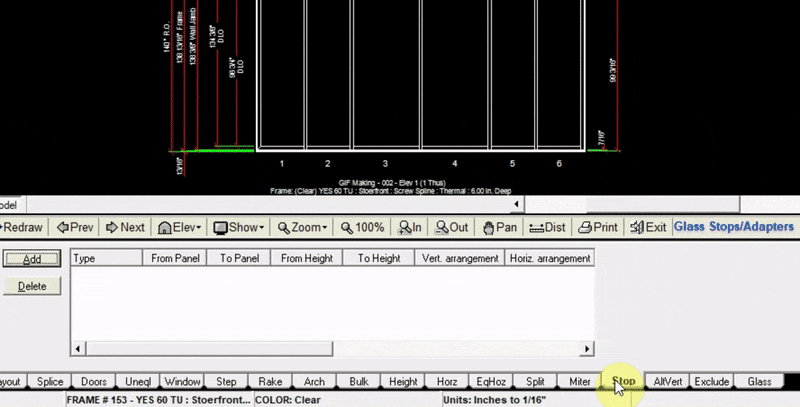
Stop Tab
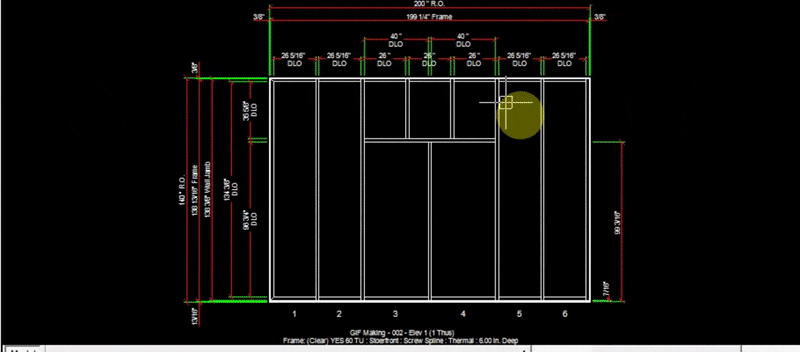
The Stop tab allows you to add glass stops to any glass opening. In this example we add glass stops to the windows in panels 3 & 4. Before adding a glass stop, a part number and profile must be specified in the Edit Elevation Frame System window.
Adding Glass Stop Part Numbers#
- Head over to the Layout tab and click
Edit Elev Frame Sys - At the top of the pop-up window, click the
Stock Length Materialtab - In the section titled
Glazing Adapter and Glass Stop Part Numbers, Click the field under the labelHorizontal StopsorVertical Stops. - Right click the area with red text saying
Right Click this Area to Open Parts List - In the Parts List, search for the glass stop part number you will be using
- Click
Insert Part. (In this example we copied and pasted the same part number for the horizontal stop into theVertical Stopfield).
Adding Glass Stop Profiles#
Before glass stops are visible in the drawing, we must specify the profile width of the glass stops.
- At the top of the
Edit Elev Frame Syswindow, click theFrame Profiletab - In the Section titled
Glass Stops, input the profiles (in inches) of the left, right, top, and bottom glass stops - Click
OKat the bottom right of the window.

Adding Glass Stops to the Drawing#
- Now that we have chosen which part numbers to use for the glass stops, and specified their profiles, we can add the glass stops to the drawing.
- Click
Addat the top right of the stop tabInput the panels in which your glass stops will be - Input the height at which your glass stops will begin (in this example they will start at the bottom of the window we added to panels 3 & 4)
- Input the height at which your glass stops will end (top of the window in this example)
- In this example we chose to add glass stops on all sides of the windows (left, right, top and bottom)
- Click
Add to Drawing. Now your drawing will be updated with the new glass stops. They will be visible as purple lines.